A Clever Mobile Image Orientation Display Trick
By:
Joel Eckert
on 9/7/2016
All you’ll need is a good reason, a good eye, and a little bit of programming. This post is intended for designers and programmers alike who are looking for a new way to enhance images in a subtle, but effective way on mobile devices. The resulting effect can even be taken advantage of fairly simply, but first lets explain why you would want to.
Why – Defining a Valid Need
Our client, Fons Vitae, has a high appreciation for fine detail and the tactile nature of authentic, hand-made art. This is reflected in their high-end business cards which feature heavy raised print with metallic gold and silver accent inks. My challenge was to figure out , “a better way to showcase their logo as a flat image on the web, that still conveyed high end tactile image qualities“. Below is GIF example of the their business card and a high quality scan of the same thing.


What – The Goal
As you can see, using a GIF or looping movie for a logo would be more distracting than anything, even if it was not jumping around. So I had to come up with something new (to me) or find some kind of trick to be able to achieve this goal.
Imagine holding a coin on one hand and a picture of a coin in the other. If you think about the difference between a physical object and an image of that object, the differences are primarily feeling and light. You can feel the surface of the coin, look at it up close, and move it around to let the light shine around it to better get a sense of its detail. Feeling a jpg is obviously out of the question (at least till something like Tactus Technology becomes widespread). So, if we focus on how light affects the surface, we may be partially able to bridge this divide. Being able to move something around to inspect how light reacts to it seemed to be a great solution to fake tactile surfaces. But I didn’t quite know where to start since I am not a programmer.
After sleeping on it, I thought taking advantage of the orientation of a handheld device to mimic “object inspection” would be possible and could be a viable solution. So I started searching Google for things like “Controlling Animation with Device Tilt,” “Faking Irradiance with an Accelerometer,” “Lenticular Images For Mobile,” ”Faking Reflective Surfaces on the web,” “Leverage Device Tilt to Enhance Images,” and “Using Phone Orientation to Control Animation.” I was very surprised how little had been written up about this type of control before. It seems like it should be very simple to do and versatile; so I just jumped in to try to get it to work. I knew I could create a sequence of images from a 3D model that had the right look, I just had to figure out how to link the two ideas. I created 3 examples which we’ll show later. The most refined example to come out of my experimenting is the one we’ll walk through now.
How – The CG Bits:
Before I could even try anything, I had to make some usable test assets. I will breeze through these steps because they aren’t as vital to conveying the idea. First, I imported the vector version of the art into 3D Max as an Illustrator 8 file. Then I extruded the splines and added a beveling to give the light an edge to shine and reflect off when viewed head-on. Next, I added scratches and other imperfections to the surfaces with texture maps, created some lights, and added a head-on camera. Then all I needed to do was animate the lights moving around which will essentially imitate moving the objects from left to right, copying how light would move across the surface. In other words, if you move the scene around the object instead of vice versa, you get a nice locked down view of the object that has moving reflections on it. My simple scene ended up looking like the GIF below:
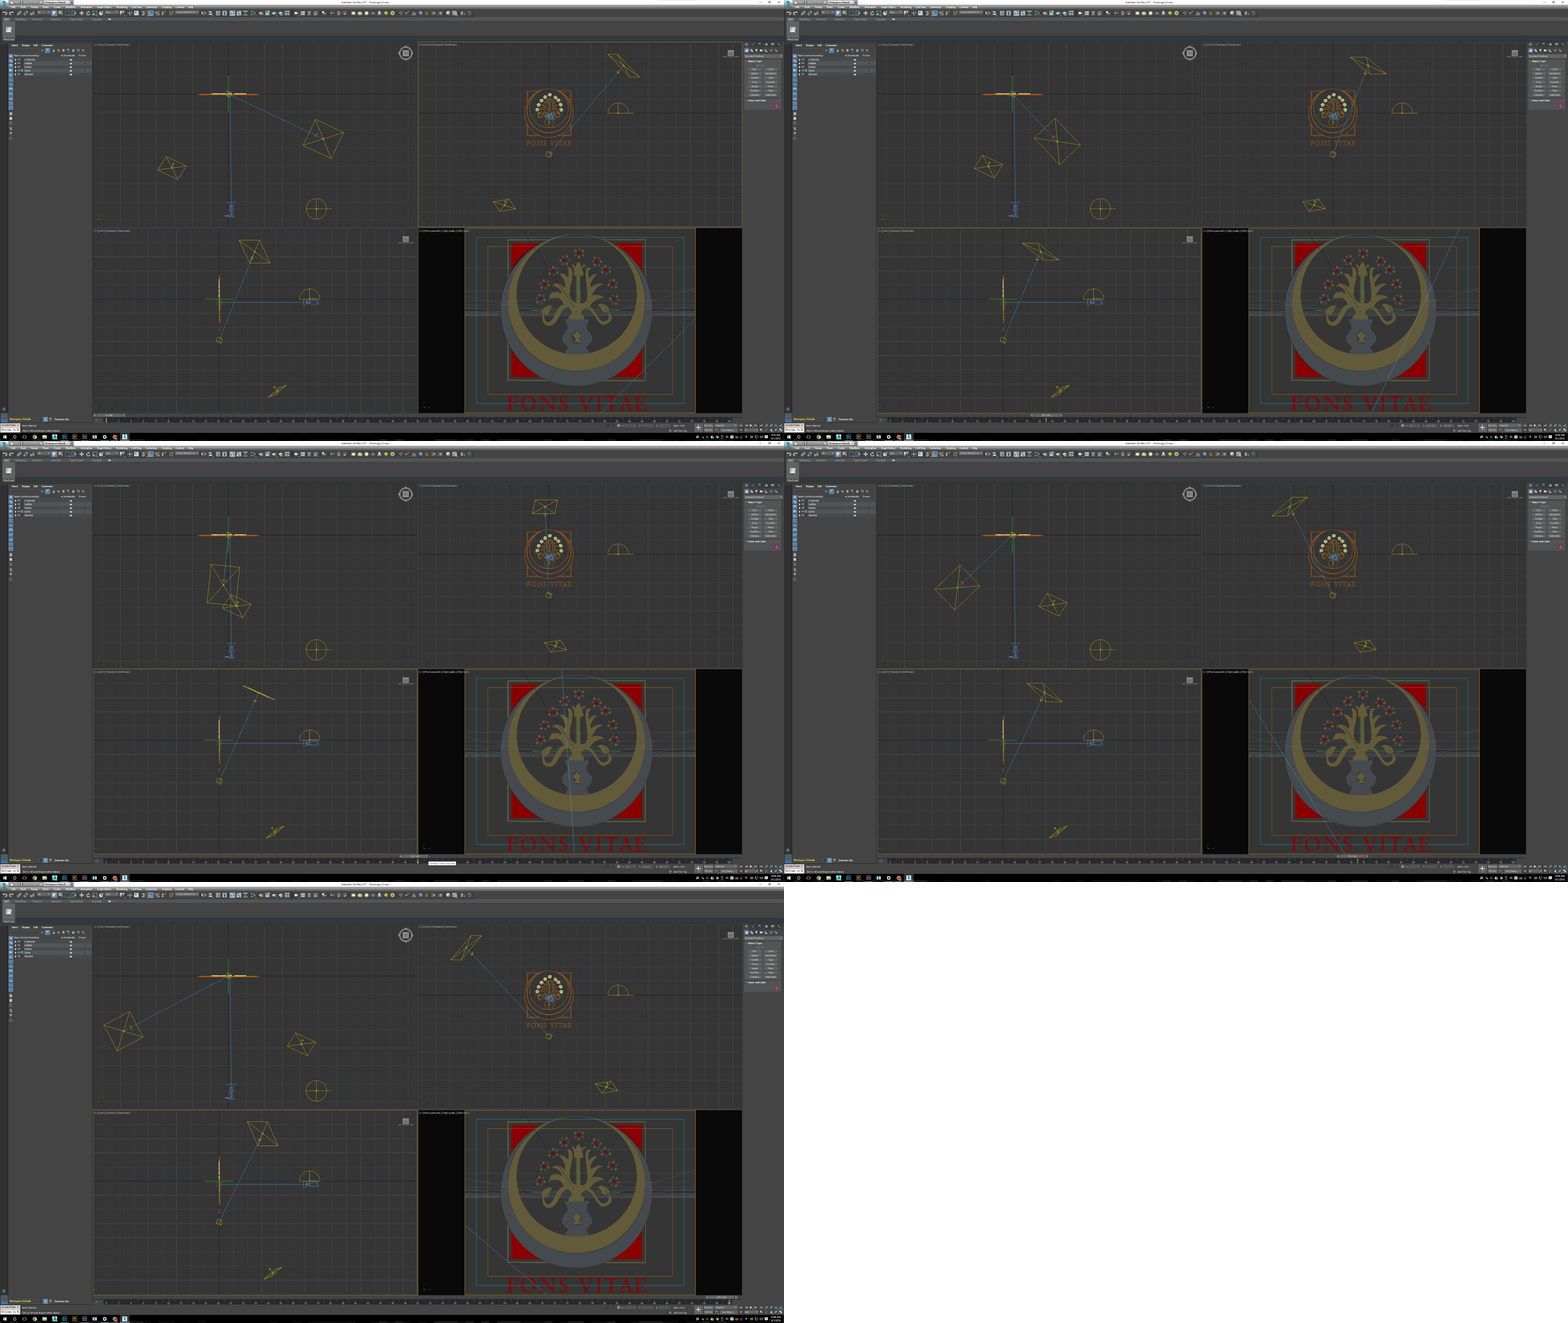
To finish up the 3D component of the solution, I just needed to render out my animation as a JPG frame sequence and then I was ready to get coding.
How – The Code Bits:
The code for what I wanted to do can simply be described as two steps:
- Determine how to access the device orientation data.
- Use that data to display a certain image from the rendered image sequence.
Of course it wasn’t quite this simple, but it wasn’t too bad to get everything working. Since you will likely inspect the code for yourself, I am just going to discuss a few important points about the coding… followed by the full HTML source code for you to inspect.
- Why choose an image sequence instead of a movie? JPG sequences can be made very small, but more importantly they don’t require a click to initiate, as movies sometimes do in order to be visible. Images, even if there are many in a sequence aren’t terribly resource heavy either.
- To load the image sequence, there is no need to make 100 loaders. Instead, make a loop to add all of the images to the file as an array and then preload the images based off that array.
- The number of images has to be correlated with degrees. For simplicity, I set it to use Beta angles 0-100, regardless of the number of images you give it. This seemed to be the most likely axis and degrees to get utilized.
- This example takes advantage of Canvas in order make the continual calls to update and is helpful for real-time value visibility.
- Device XYZ rotations are internally known as Alpha, Beta, Gamma inside the device orientation listener. See image description below to understand those orientations.
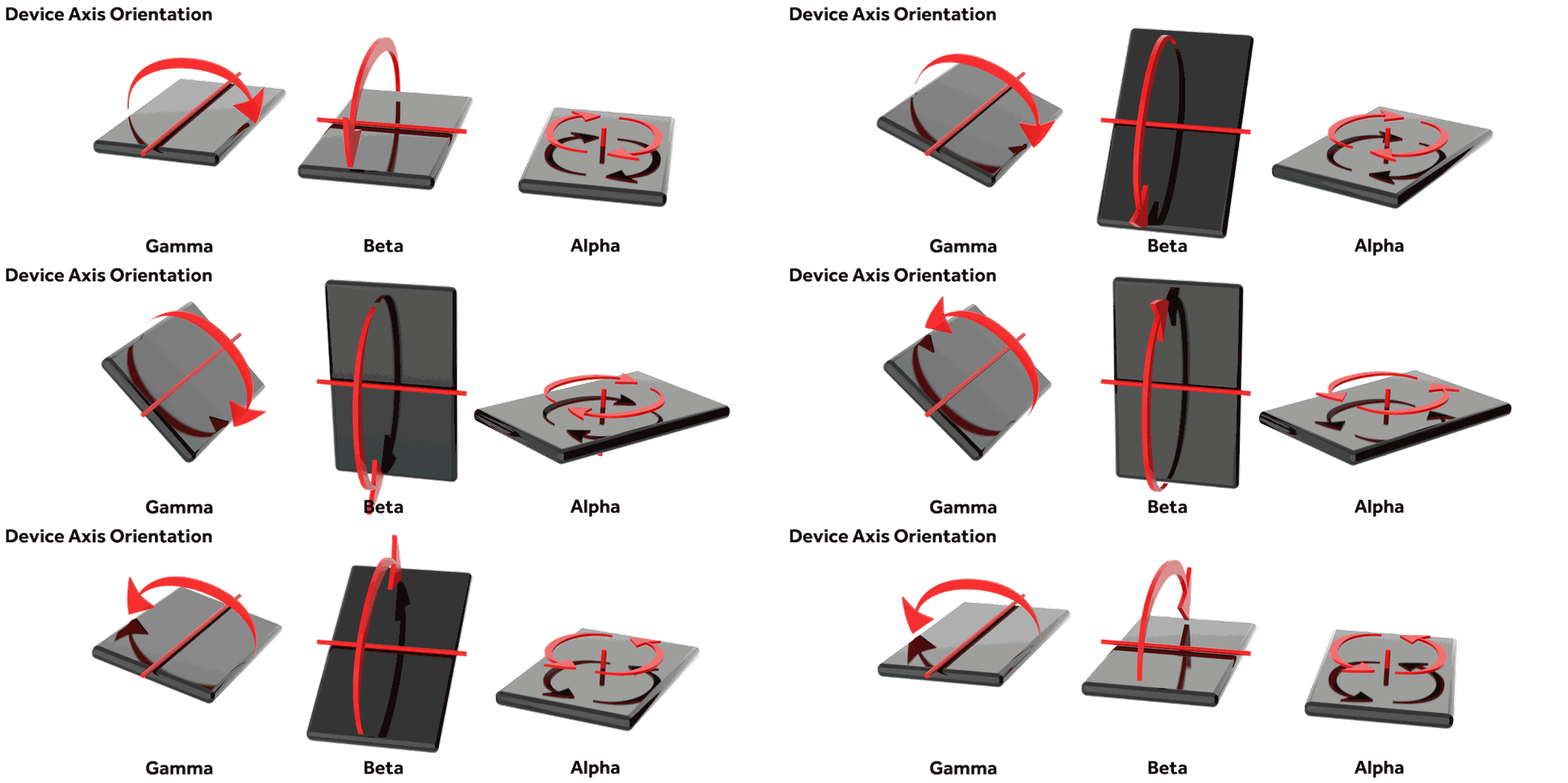
- An easy way to manage frames in code is to keep everything between 0 and 100 since this correlates to 0-100 degrees of movement on a Beta axis. If you have less frames, you can just do a bit of math to correct the offset. The CD example you’ll see later only has 20 frames and still looks good because of this correction. If we didn’t correct the frame count, the movement would only fall into a range of only 20 degrees of movement, or 1 image per degree.
- Different Mobile/Tablet platforms may use different recognition systems for orientation detection. Hence there may need to be a need to do some device and usage detection statements. This is started but incomplete in my examples.
- A site’s load time can be increased if image count is not well controlled. Image count and load restrictions will have to be both a design and requirement decision.
Here is the full source which is well commented for comprehension.
Lets See The Results!
Look at the image below on your phone or tablet and tilt your phone on the Beta axis to see the effect.
https://viastudio.com/mobile-shimmer-test
Ut Oh, Didn’t load.
Additional Examples of the Orientation Technique:
- Creating Virtual Iridescence: Iridescence by definition is ‘a lustrous rainbow like play of color caused by differential refraction of light waves that tends to change as the angle of view changes’ . An early test to see what a CD would look like using some frames of video reveals the anisitropic qualities of a disc. Conveying this in a single image would be impossible. Using photography is trickier, but can be done really well with some clever planning. The following example is not refined, however it also doesn’t need to be to convey the concept. Just tilt your device on the BETA axis to see the effect of this example.
https://viastudio.com/mobile-shimmer-test/CD_Test.html
Download these source files for this sample here: VIA_Studio_CD_Test
- Reflective Surface Enhancement. Sometimes details are hard to see at certain angles but become very easy to see if your able to move the light around. Picture a bright and shiny coin. You naturally spin it around in different ways to get an better understanding of the detail. You can now replicate this. Below is not the best quality example, but it serves as a sufficient proof-of-concept.
https://viastudio.com/mobile-shimmer-test/Dime_Test.html
Download these source files for this sample here: VIA_Studio_Dime_Test
- Parallax Control: If planned and carefully executed, this could be a creative way to control animation or even effects like parallax. This is utilized in games and apps all the time, but I have never come across a page that used it for these purposes.
- Logo Enhancement: To make subtle images stand out as important or feature elements.
- Material Realism: I can see this technique being used very easily to help people sell products that need accurately convey what surfaces are like. For high quality finishes and surfaces with depth, sometimes it is hard to see what the details of that surface are as a still image. Things such as stainless steel and engravings would be good examples that could be showcased with this trick.
- Easter Eggs: Use this to create a clever and fun creative Easter eggs for pages. I mean, everyone really loves discovery! See by tilting at bottomâ¦.
Conclusion….
So go play around and use your imagination as to how device orientation can make things a little more interesting. I believe if used properly, it can introduce a little bit of polish to your next project. Be sure not to overuse the idea! If you do, you risk being creating a distraction instead of an enhancement. Be sure tell us if you use this idea somehow, we’d love to see it put to use in cool and unexpected ways! (Note that this last image won’t look like much unless you’re on mobile!) Thanks for reading!
Ut Oh, Didn’t load.
Related Posts
Component-Based Web Design
By:Morgan Plappert on 8/9/2024
Designers and developers are always looking for ways to make handoff easier, collaboration more seamless and our processes better aligned. Automation, consistency and efficiency, without compromising creativity. It’s a constant battle and often times, a balancing act.
Read More »Dive into the Sanity Structure Builder
By: Mark Biek on 6/13/2021
Sanity is the super fast, super customizable CMS that we're using as the backend for the new via.studio website. One of the more powerful concepts that Sanity is the Structure Builder which gives you the ability to customize how content is presented in the Sanity admin.
Read More »
